


Hi, Nico here. My two previous posts about game design were about theory. For today, I thought I’d share something more practical. I will give a step-by-step tutorial on how to quickly prototype different unique cards using a spreadsheet program (in this case Google Sheets) and the Variables feature of Photoshop.
Note: In the context of this blog post, what I mean by “prototype” is to come up with playable version of your game as quickly as possible so you can go right into testing it. This is not about making a mock-up of what your final game will look like.
I’ll be sharing the files I used in this tutorial so you can try them out yourselves.
Why even?
Have you ever designed a game with 30+ cards? Did you notice how much time you’d spend scribbling all those details into each and every card? Even with the help of computers, you’d have to edit each and every file for each unique card. All this time spent could have been used testing your game instead. Hopefully after reading this blog, you can drastically reduce your prototyping time and spend more time testing.
Though this method might take time to setup at the start, it pays off when you start making changes. Instead of manually having to type in new changes, this system allows for changes in your spreadsheet to be automatically applied to all your cards.
Step 1: Create your Spreadsheet
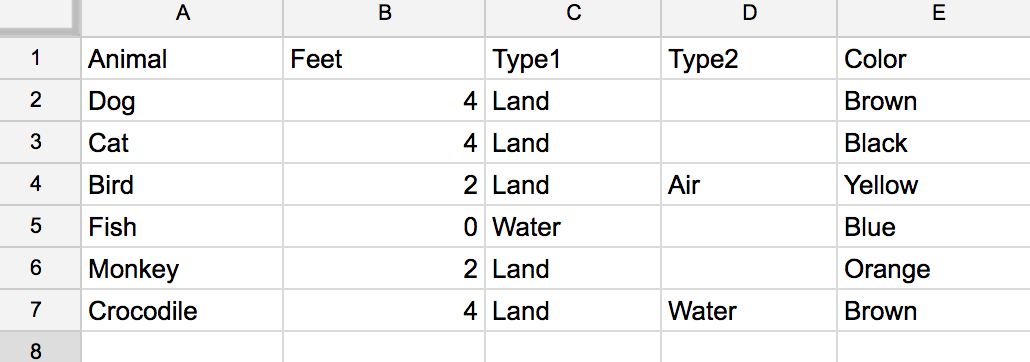
The first step is to list down all the details of your game in your spreadsheet. For starters, make a Database sheet. In the Database sheet, make a column for the names of each unique card in your game. Next, make columns for each of the important attributes of your cards. Finally, fill-up your spreadsheet. Don’t worry about formatting for now.
Step 2: Create the Photoshop Template
You’ll need to make a Photoshop template of your card layout.
A word on using Variables/Data Sets
Later, we will be using data sets to automatically edit the layers in your template. Data Sets can alter layers in 3 different ways:
- Visibility – whether the layer is visible or not
- Useful for setting “Types” and “Icons” in your cards. Basically, you can set some layers to be visible in some cards while invisible on others.
- Text Replacement – replace the text in a Text Layer
- Useful for the “Name”, “Abilities”, “Stats”, and all text variables of your cards. The text will be replaced by the data in your spreadsheet.
- Pixel Replacement – replace the image of a Layer
For now, we will only be using Visibility and Text Replacement since we’ll assume artwork isn’t integral to testing your game.
Create your Card Layout
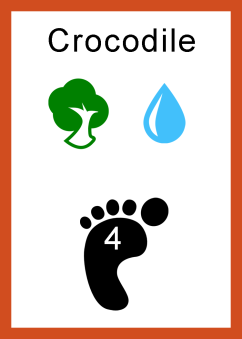
Open Photoshop and make a new document. Set the size to the card size you want (typical poker and Magic cards are 2.5″x3.5″) then layout the important parts of your card. To help you in the layout, choose the card in your database with the most attributes and use it as your sample. For Animals TCG, I used Crocodile.
Text Variables
Create a single Text layer for each of your text variables. For my Animals TCG, I made a text layer for “Animals” and “Feet”. Make sure these layers are Paragraph Text and give them ample space to fit the longest text from your database.
Visibility Variables
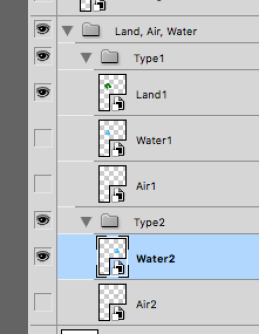
Make a layer for each of the images you want to toggle visible or not. For my Animals TCG, some animals have one type while others have two. In my layout, the image of the first type is to the left while the image of the second type is to the right. I made two layer folders for Type1 and Type2 and placed overlapping logos of each type in them.
For the “Color”, I just made overlapping border layers for each color.
Don’t forget to make your layer names clear or you’ll have problems later finding them.
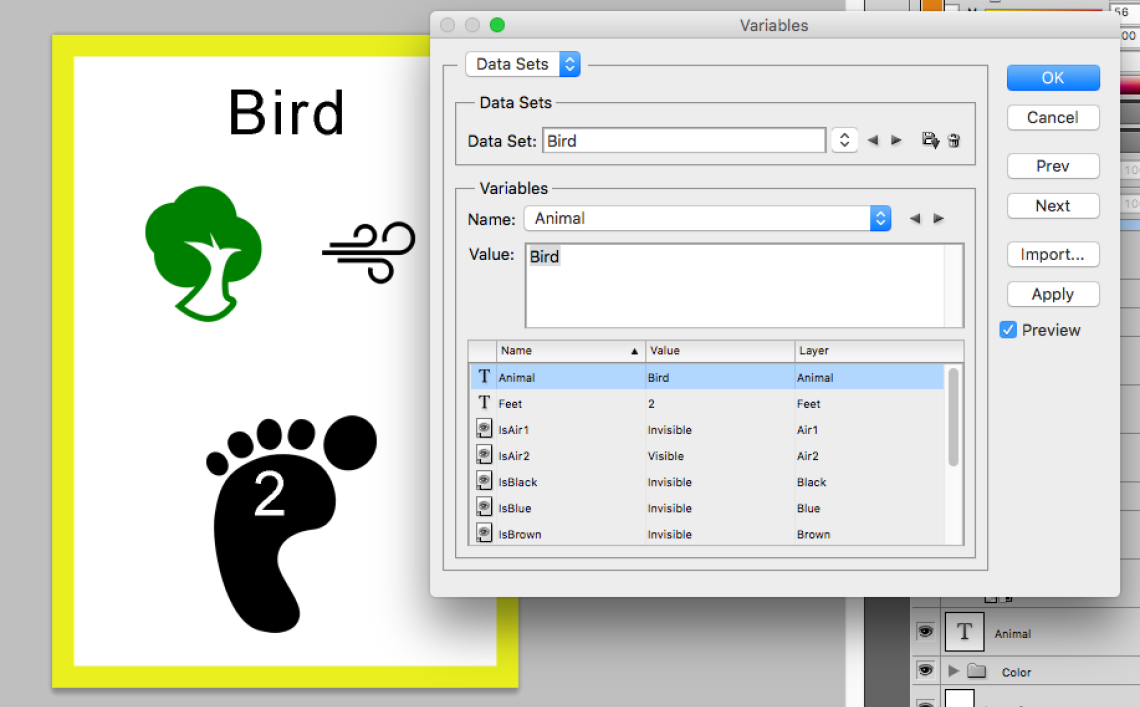
Create the Variables
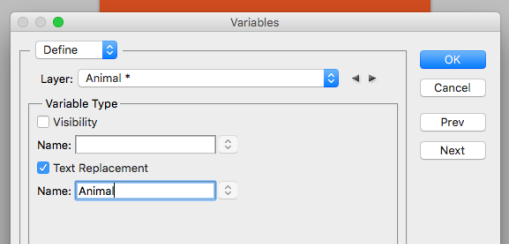
Go to Image>Variables>Define…
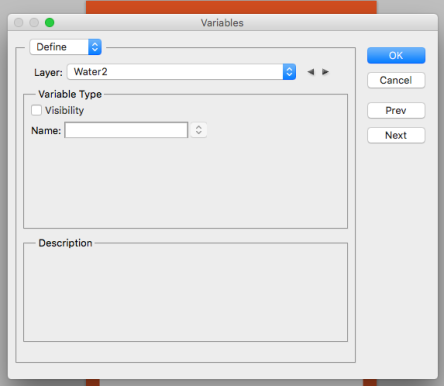
From here, we will define our variables and their types. Under the Layer dropdown menu, select a layer which you want to add a variable to. Here, I select the “Animal” layer then check the “Text Replacement” option. I then name the variable “Animal”.
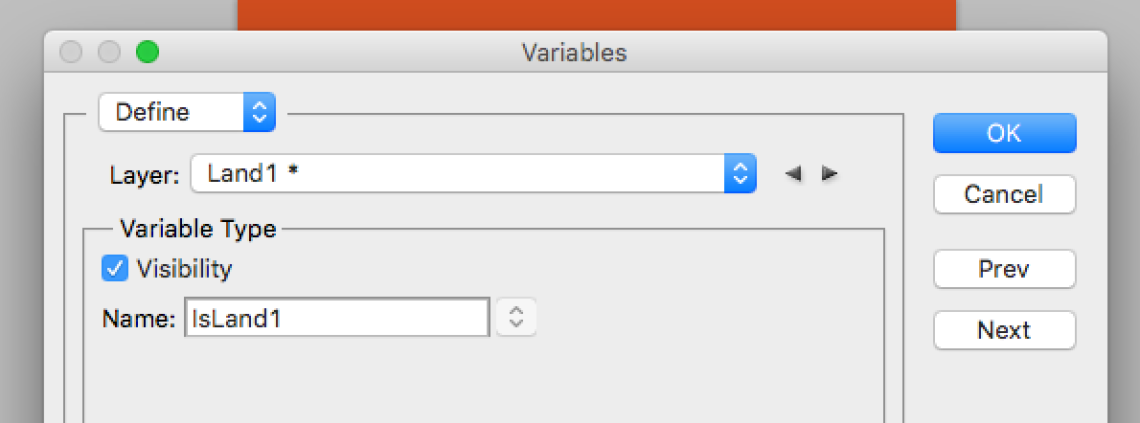
Similarly, in the “Land1” layer, I check the Visibility Variable option and name the variable “IsLand1”.
Do this for all your variables. Take note of your variable names as they will be important in the next step.
Step 3: Make a CSV of your Spreadsheet
We will have to format your data to make it easy for Photoshop to read.
- Visibility Variables need TRUE or FALSE to know if it will toggle the visibility or not.
- Text Replacement Variables need a string of the replacement text.
Making the CSV Sheet

Go back to your spreadsheet and add a new sheet and name it the CSV sheet. Make a column for each of the Photoshop Variables you created in Step 2. Fill in this new sheet using values from the Database sheet. For example, I set the “Animals” column of my CSV sheet to the “Animals” column of my Database sheet.
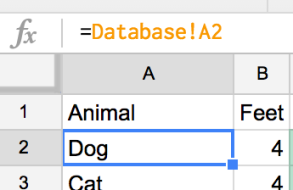
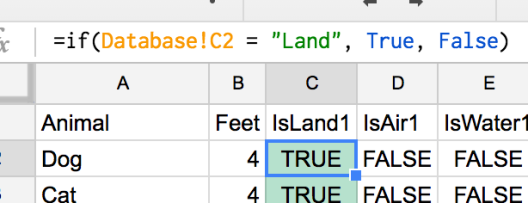
For Text variables, you just have to equate it to the corresponding cell on the Database sheet. However, for the Visibility Variables, you will have to use IF statements and other spreadsheet functions to get TRUE or FALSE.
For Example, if my animal’s first type is Land, I want my Land1 layer to be visible. Therefore, for my IsLand1 variable I will set the IF statement to give me a true if Type1 is Land.
Depending on your card game, these logic equations can get pretty complex. It could be worthwhile to read up on spreadsheet functions and logical operators like OR and AND.
Once the CSV sheet is setup, you don’t have to worry about it as you make changes to your game. When you do make changes, just edit the Database sheet. Since the CSV sheet is dependent on it, it will automatically update.
Download your CSV file
Once you’re done, download the CSV sheet’s CSV file. In Google Sheets, it’s File>Download As>Comma-Separated values.
Step 4: Input the CSV to Photoshop
In Photoshop, go back to the Variables window. On the top left corner, change the setting from Define to Data Sets. Click the Import… button at the right side. In the new window, select your CSV file and import it. Make sure to check ‘Use First Column For Data Set Names‘.
Tada! Your data has just been imported into your template! You can now preview each and every card through the Variable window.
If there’s a mistake in one of your cards, it’s most probably a mistake in the spreadsheet that can easily be corrected. You can now even move stuff in your layout template and the data will still be there.
Step 5: Exporting each Data Set
Go to File>Export>Data Sets as Files….
Once you’ve selected a folder and fixed all your naming conventions, you can export each unique card into it’s own PSD file.
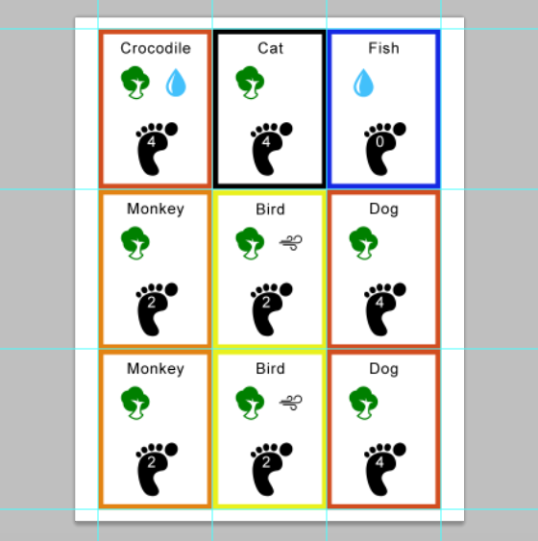
Step 6: Layout your Print Sheets
Create another PSD file to the size of your printing paper.
Create guides and cutting lines
Create guides so that you can easily snap the images of your cards onto that template. If you’re printing Poker Size cards on Short Bond Paper, I recommend you use these guides:
- Horizontal: 0.25″, 3.75″, 7.25″, 10.75″
- Vertical: 0.5″, 3″, 5.5″, 8″
(Actually, the link to the file is below so you don’t need to make a new one…)
Trace your guides with a 1px pencil. This will help you later when cutting out your cards. The guides are especially useful if the border colors of your cards are the same.
Place the PSDs
Copy the PSD files you generated into this printing template by simple dragging your PSD files into it. Snap your files in their slots. Rinse and repeat depending on the number of cards you need to print.
Step 7: Printing and Sleeving
Export your print sheets to PDFs and get to printing. I don’t have to tell you how to cut and sleeve the cards. Anyone whose designed a card game has already lots of experience doing that.
Additional Automation
If you have scores of cards, laying them out on a print sheet can take up a lot of time and it’s a very menial chore. I wrote a program to automate this but it’s not yet user friendly so I can’t share it yet. Maybe some day I will share it once I’ve had time to work out the kinks. For now, it’s one of Balangay’s secret weapons hohoho
The Files
As promised, here are my files so you can experiment with your own data sets 🙂
Let me know if this was useful and if any of the instructions aren’t clear. Hope this helps you in your game dev cycles 😀
P.S. There’s no Animals TCG…